

Hey there! I Hope you’re having a great day! Today, I’m going to share with you how I created these clean, simple, yet elegant-looking cards. It’s really easy to make these using the intricate dies from your stash, which most scrapbookers like me would be hoarding to use them on albums. So let’s get started!…
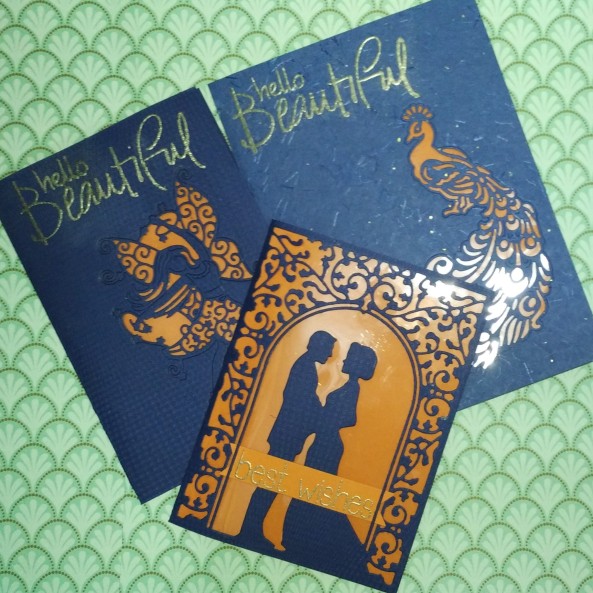
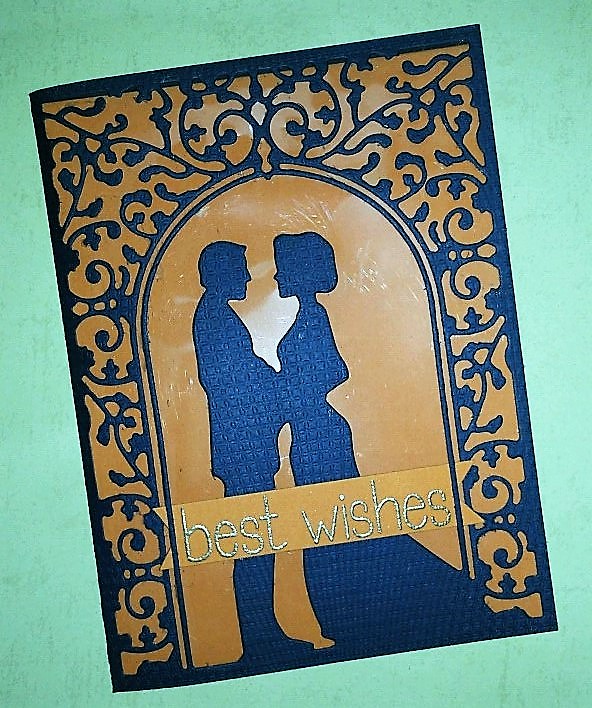
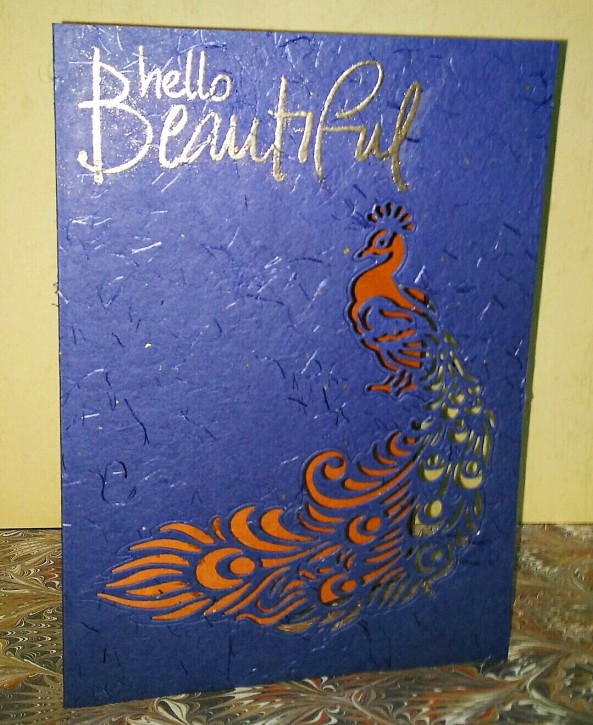
I picked up two A4 size Navy Blue card stocks that have a very subtle pattern on them, as you can see in the featured image. I cut and trimmed them into side-folding note cards of different sizes according to the size of the dies I planned to use on them. I used the Wedding Vows dies from Cheery Lynn Designs, and the Peacock and Heather Fairy dies from Tattered Lace, to die cut the front of each note card. I used a metal shim in my big shot to ensure clean cuts.


I also cut out three rectangular panels from orange cardstock, and also from clear acetate sheets to fit inside each note card. (The third one is missing in this image!)

I adhered the orange panels inside the note cards so that it could be seen through the negative spaces of each die cut. I had fun using the combination of blue and orange colors.
Now, to keep the front of note card sturdy, I adhered the acetate panels behind each die cut. I made sure to remove any of the adhesive that seeped through into the negative space, using my craft knife.
I stamped the sentiments with Versamark watermark ink, and then heat embossed them with Ranger Liquid Platinum embossing powder. I used the ‘hello’ and ‘best wishes’ sentiments from Lawn Fawn – So much to say stamp set, and the large ‘Beautiful’ sentiment from Clear stamps – Hope and Smile. Since there was not much space on the Bride-&-Groom card, I cut out a banner from the remaining orange cardstock, stamped the ‘best wishes’ sentiment onto it, and adhered it to the bottom of the card.
Here are few pictures of my completed cards:


And here is the side-view of each card. I just love being able to partially see through to the orange.


Supplies:
1. Blue Fancy Cardstock - 250 gsm
2. Orange cardstock
3. Clear acetate sheet
4. Wedding Vows die (from Cheery Lynn Designs)
5. Peacock and Heather Fairy dies (from Tattered Lace)
6. Lawn Fawn clear stamp- So much to Say
7. Clear stamps - Hope and Smile
8. Ranger Liquid Platinum embossing powder
9. Versamark watermark stamp pad
10. WOW! Embossing heat gun
11. Big shot machine
12. Cutting plates
13. Metal shim
14. Scissors and adhesive
I would like to enter my peacock card for the following challenges:


I hope you enjoyed my tutorial, and that you are inspired to create, too! Thanks a bunch for your time. I would love to read your comments.
Happy crafting! ♥

They are very elegant designs and I love the rich colour combo you have used with your intricate dies. The peacock looks particularly classy and the texture in the blue card almost looks like peacock feathers! Thank you for playing along with us at Less is More this week 🙂
LikeLiked by 1 person
Thank you so much Sarah! 🙂
LikeLike
Peacock very beautiful.
LikeLike
Thank you Pa
LikeLike
What beautiful cards! I love the vibrant combination of blue and orange, and I sure do wish I could meet some peacocks on a spring walk round here! More likely to be pigeons for me, sadly! Gorgeous makes… love them 🙂 Thanks so much for playing along with us at Less is More 🙂
LikeLike
Thank you so much! 🙂 I love peacocks too! ❤
LikeLike
Wonderful CAS Cards! Thanks for playing with us this month at Craftsneed Challenge:)!
LikeLiked by 1 person
Thank you 🙂
LikeLike
Wonderful, vibrant and striking cards. Loving that bold blue with your intricate dies.
Thanks so much for playing with us at Less is More this week. x
LikeLiked by 1 person
Thank you Sarah! 🙂
LikeLike
Lovely detail here. The texture and bold blue are a great base to surround your sunny colours.
Thanks so much for sharing with us at Less is More, Anita x
LikeLiked by 1 person
Thank you so much Anita 🙂
LikeLike
Pretty 🌸 n dignified designs💚
LikeLiked by 1 person
Thank you Ma 🙂
LikeLike
beautiful set of cards.. Thanks for joining craftsneed challenge.. Good luck
– Afreen , DT
LikeLiked by 1 person
Thank you Afrreen
LikeLike